Introduction
INNER HOUSE is a platform to control smart home products where you can integrate all IoT devices and brands compatible with IFTTT. This means you can join various smart home brands into a single platform.
INNER HOUSE sends Webhooks service notifications to IFTTT Applets to trigger a change of state on your smart devices, hence any device compatible with IFTTT can be controlled. Also, INNER HOUSE can receive API notifications to keep track of device status. Workflow is simple: Upload house floor plans, setup IFTTT Webhooks key ID, configure weather & location, and set up devices.
Getting Started
First, you need to create an account, then upload your floor plan(s) image(s), add the IFTTTT webhooks Key ID, add your house location, and set up your devices. Follow below instructions, they are a bit technical, but if you follow those instructions you will be able to control your devices.
Quick Install Guide
Note: Initial setup screens are not available for mobile devices, please use a computer (Mac or Windows) upload your floor plans and set your devices up. Once device setup complete you can use a mobile app (iOS or Android) if you want.
-
Upload an image (JPG or PNG ) of the floor plans of your beautiful home, you can use your existing floor plans image, or any floor plans tool or just to draw a hand sketch (in a paper or in a napkin if you want) of your home layout.

-
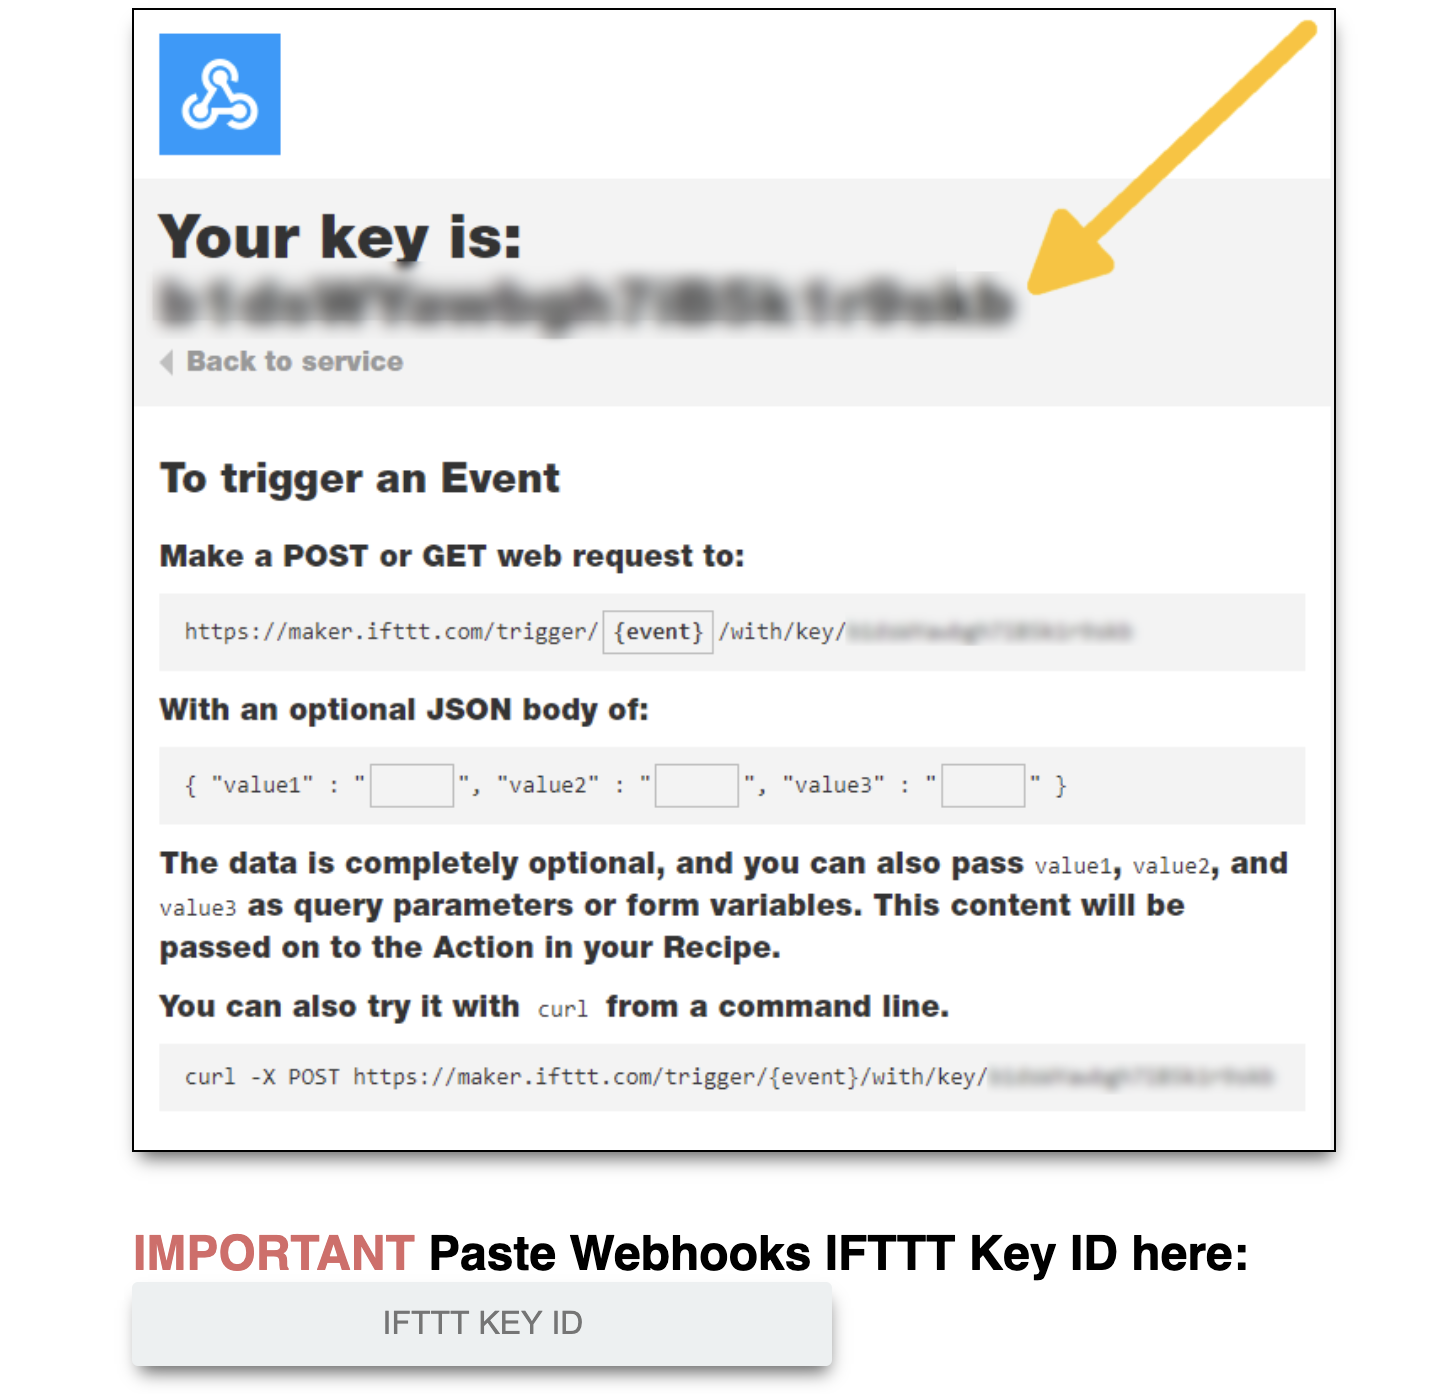
Add IFTTT Webhooks key, follow these instructions to setup IFTTT webhooks and obtain the Key. The main objective of this step is to obtain a Key that will be used to send notifications to control your devices. See below screen shot:
-
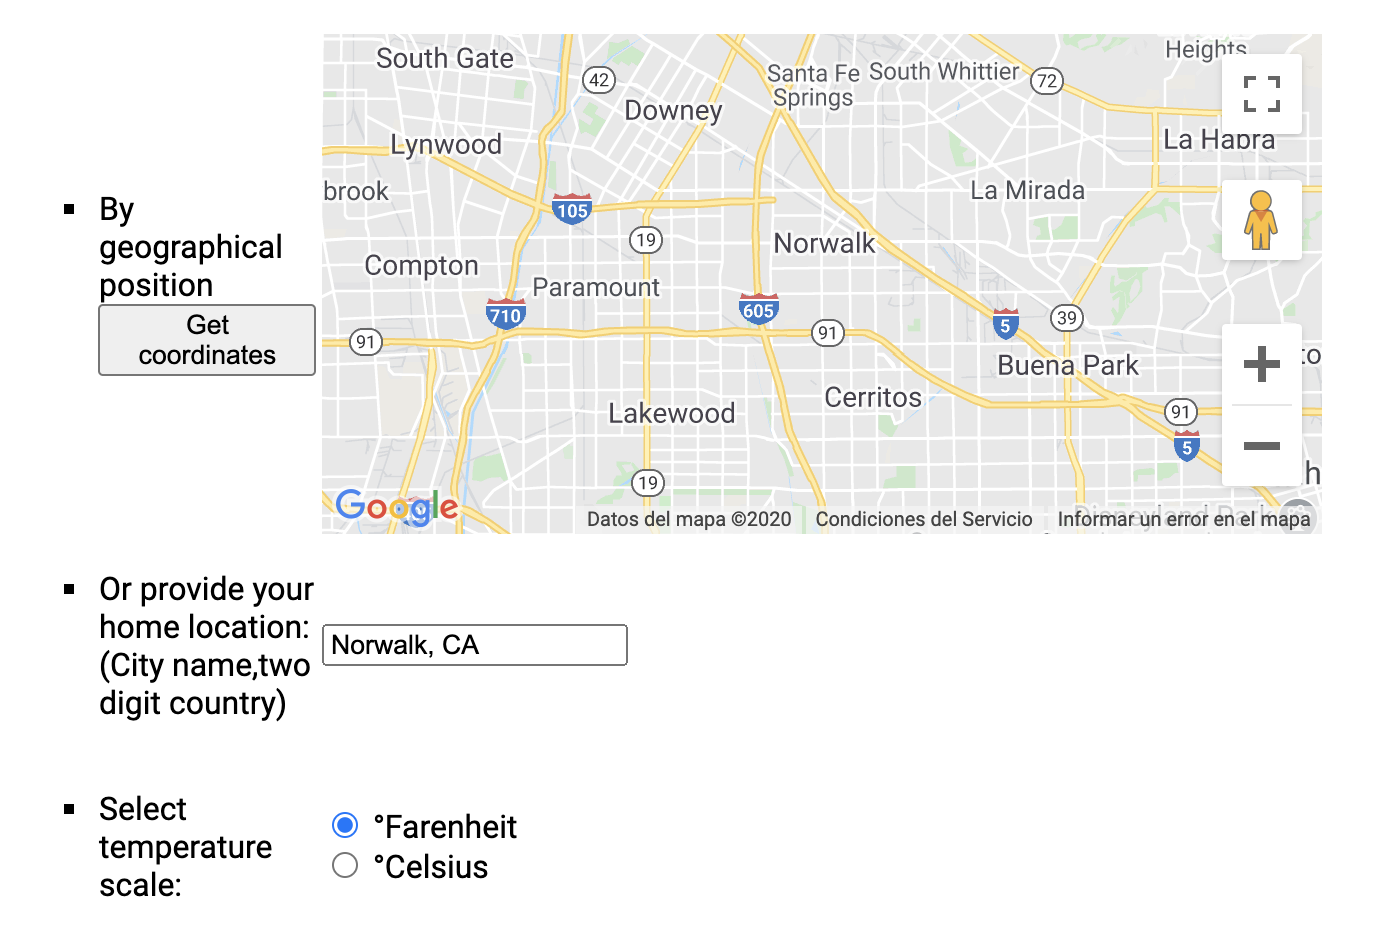
Add your home location by either geographical position in the map or by providing the city location, and select temperature scale in order to obtain weather conditions.
-
Add your smart devices

4.1 Floor plan, this will display the floor plan image you uploaded on Quick Install guide - Step 1.
4.2 Device ID, this field is important because it is the ID that webhook will use to control your devices.
4.3 Device description, this field will be shown in the platform to identify your device.
4.4 Device Location, this field will be used to group devices (if you have two or more devices that are in the same location, use the same location on the devices)
4.5 Device Type, this check box is to select the device type and will show an icon of the device, just drag the device into the floor map to define the position of this device.
4.6 Device Size, you can change height, width and rotate device.
4.7 Once you position your device in the floor map just click on [Save] button. Follow below instructions to set it up on IFTTT.
Add as many devices as you want (if you add more than 4 then buy a subscription) Once you finish adding your devices click on [Finish].
Note: later you can change, rename, reposition or add new devices if you want.
Link to IFTTT Webhooks Service
Note: Follow below instrictuons to setup each device in IFTTT, make sure you create TWO IFTTT applets, please follow below instructions TWICE, and in step 6 each time use following values:
For the first applet use [DeviceID]ON where [DeviceID] is the name that put to your device on step 4.2
For the second applet use [DeviceID]OFF where [DeviceID] is the name that put to your device on step 4.2
- Go to : https://ifttt.com/create (Sign in if needed)
- Click on the + sign to create a new applet

- On Choose Service screen click on “Search services” and type “Webhooks”
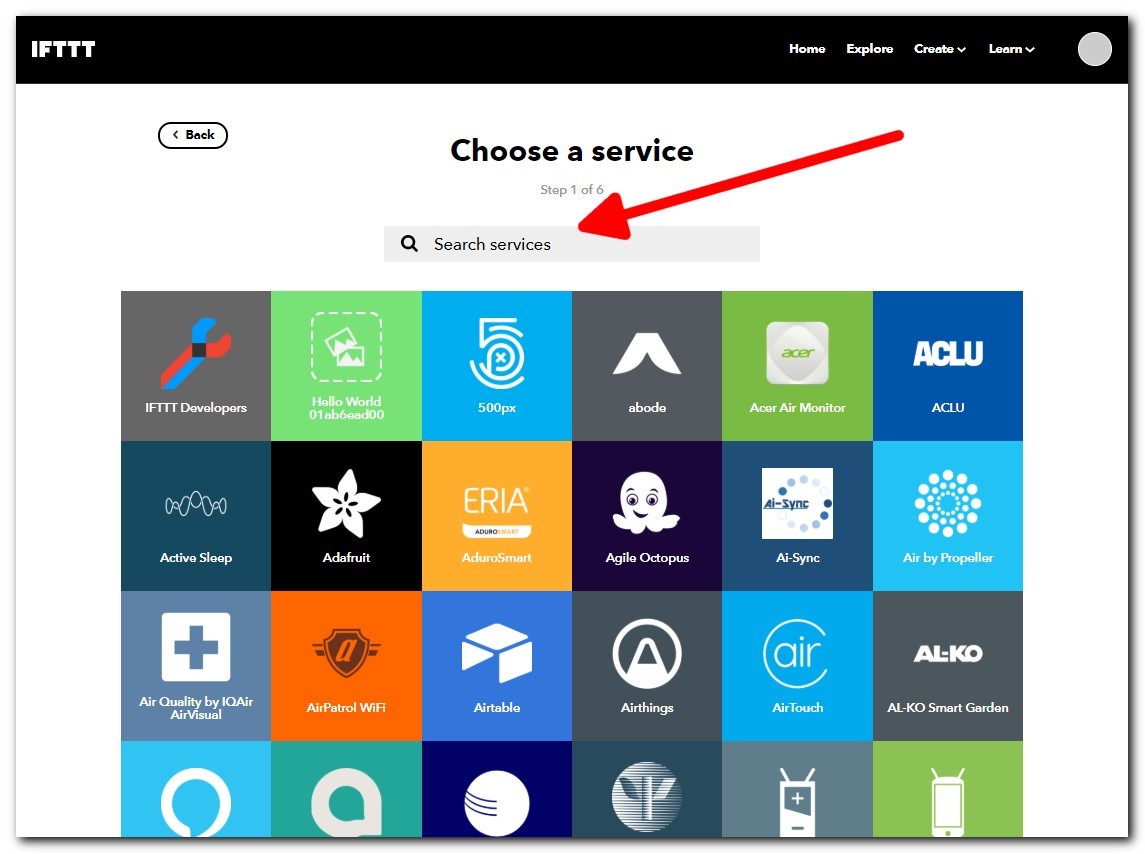
- Select Webhooks service

- Click on “Receive a web request”
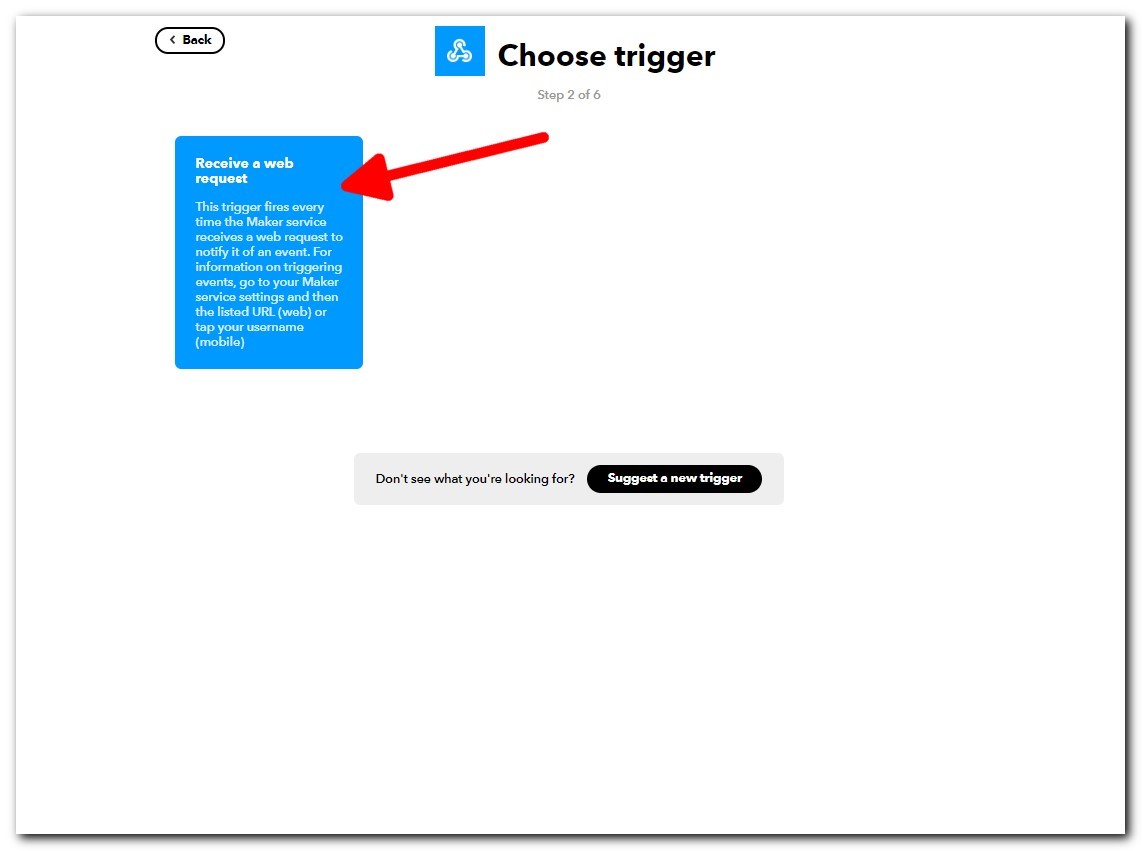
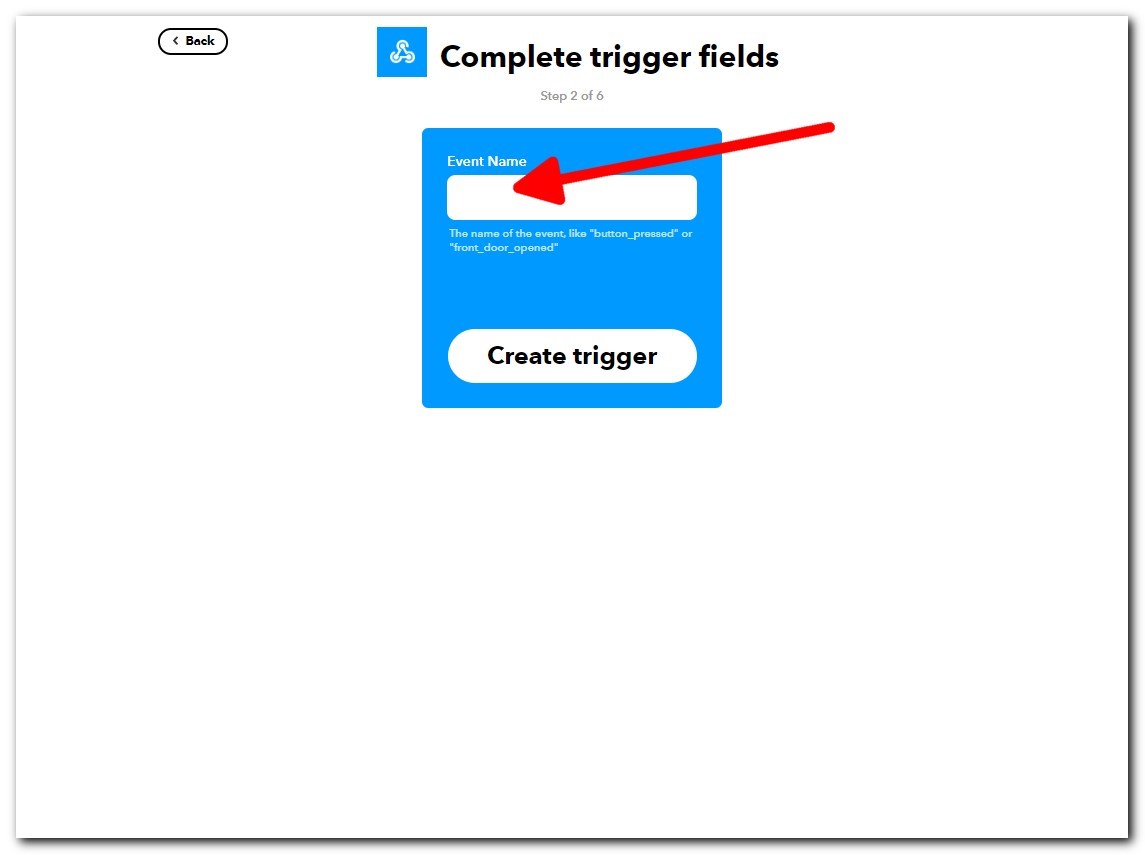
- Under Complete trigger fields, in the input box for Event Name add this string: KitchenON for the first applet and KitchenOFF for the second applet
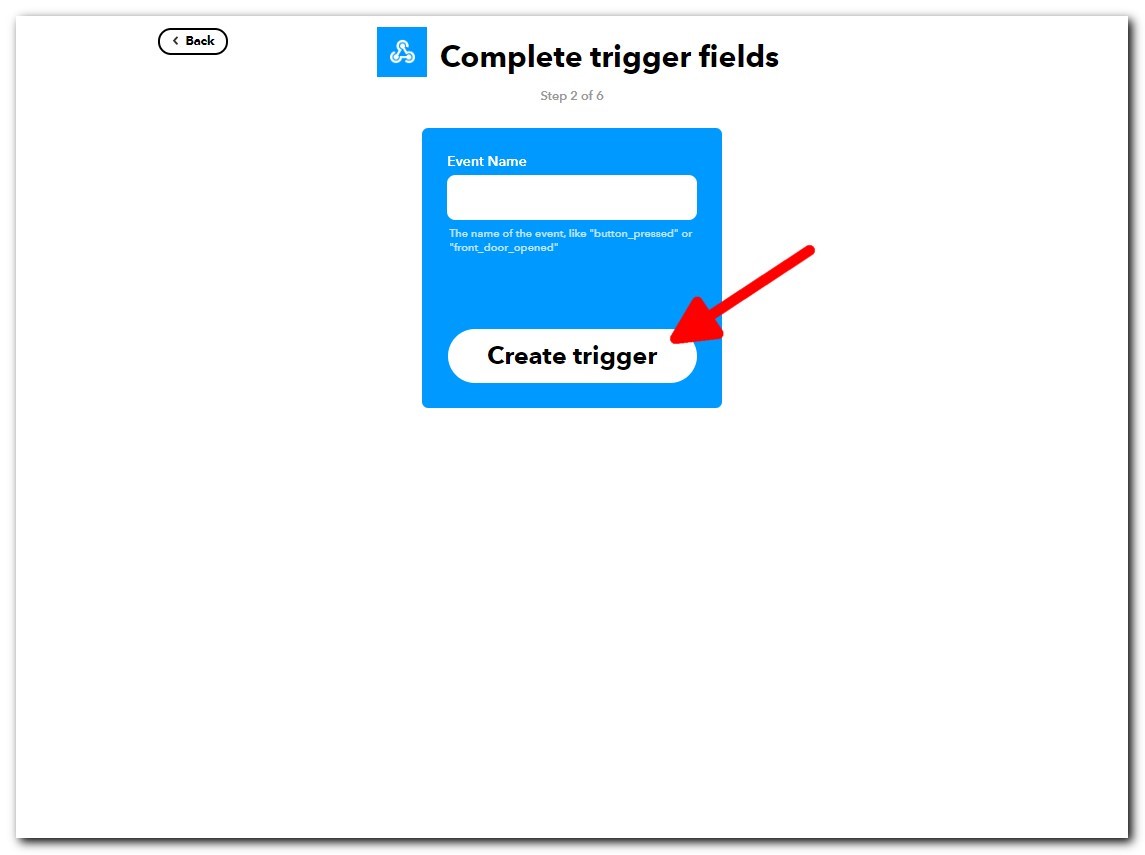
- Click on [Create trigger] button
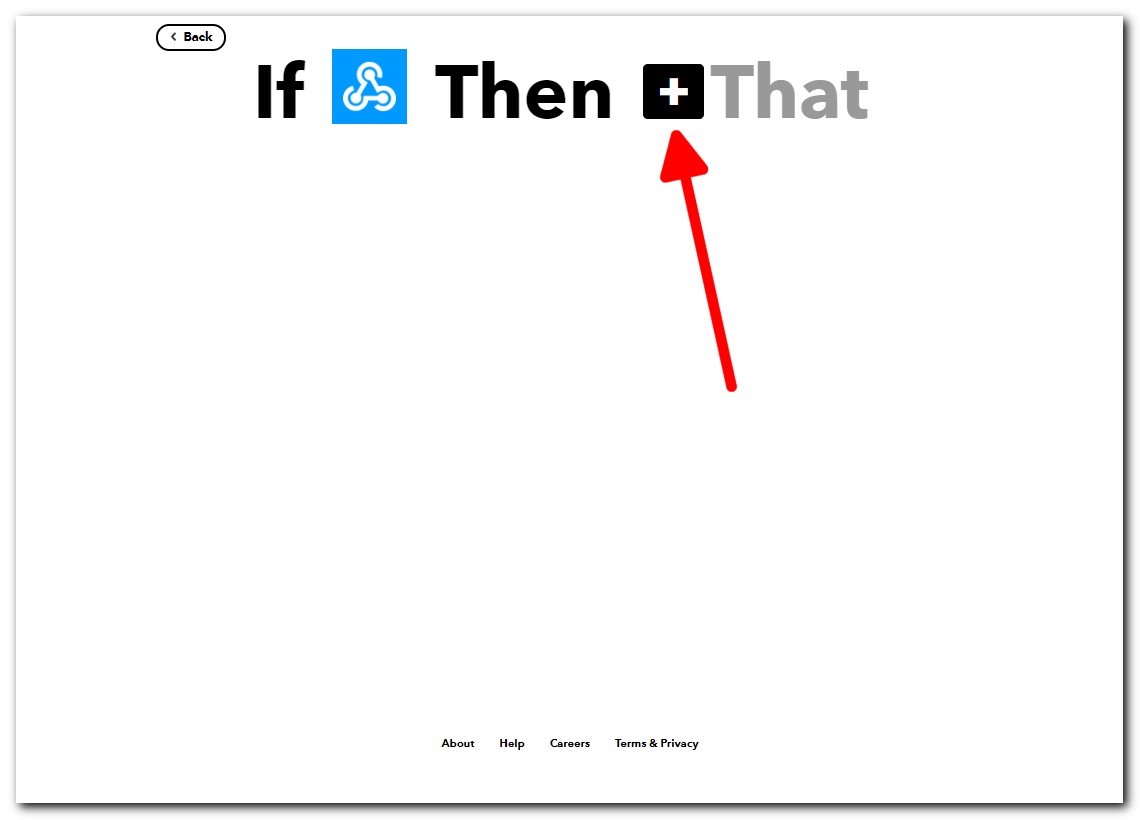
- You should see a screen like this, now click on the + button and add the smart device you want to control.
Note:
If in step 6 you added [DeviceID]ON then add the applet with the smart device turned ON.
If in step 6 you added [DeviceID]OFF then add the applet with the smart device turned OFF.
